Create your first quote, step by step
From dashboard Quick Actions to Send to Client — annotated screenshots of the live app.
This walkthrough takes you from the dashboard to a client-ready quote: request (optional) → build days → pricing → preview → send.
- 1
Start from the dashboard
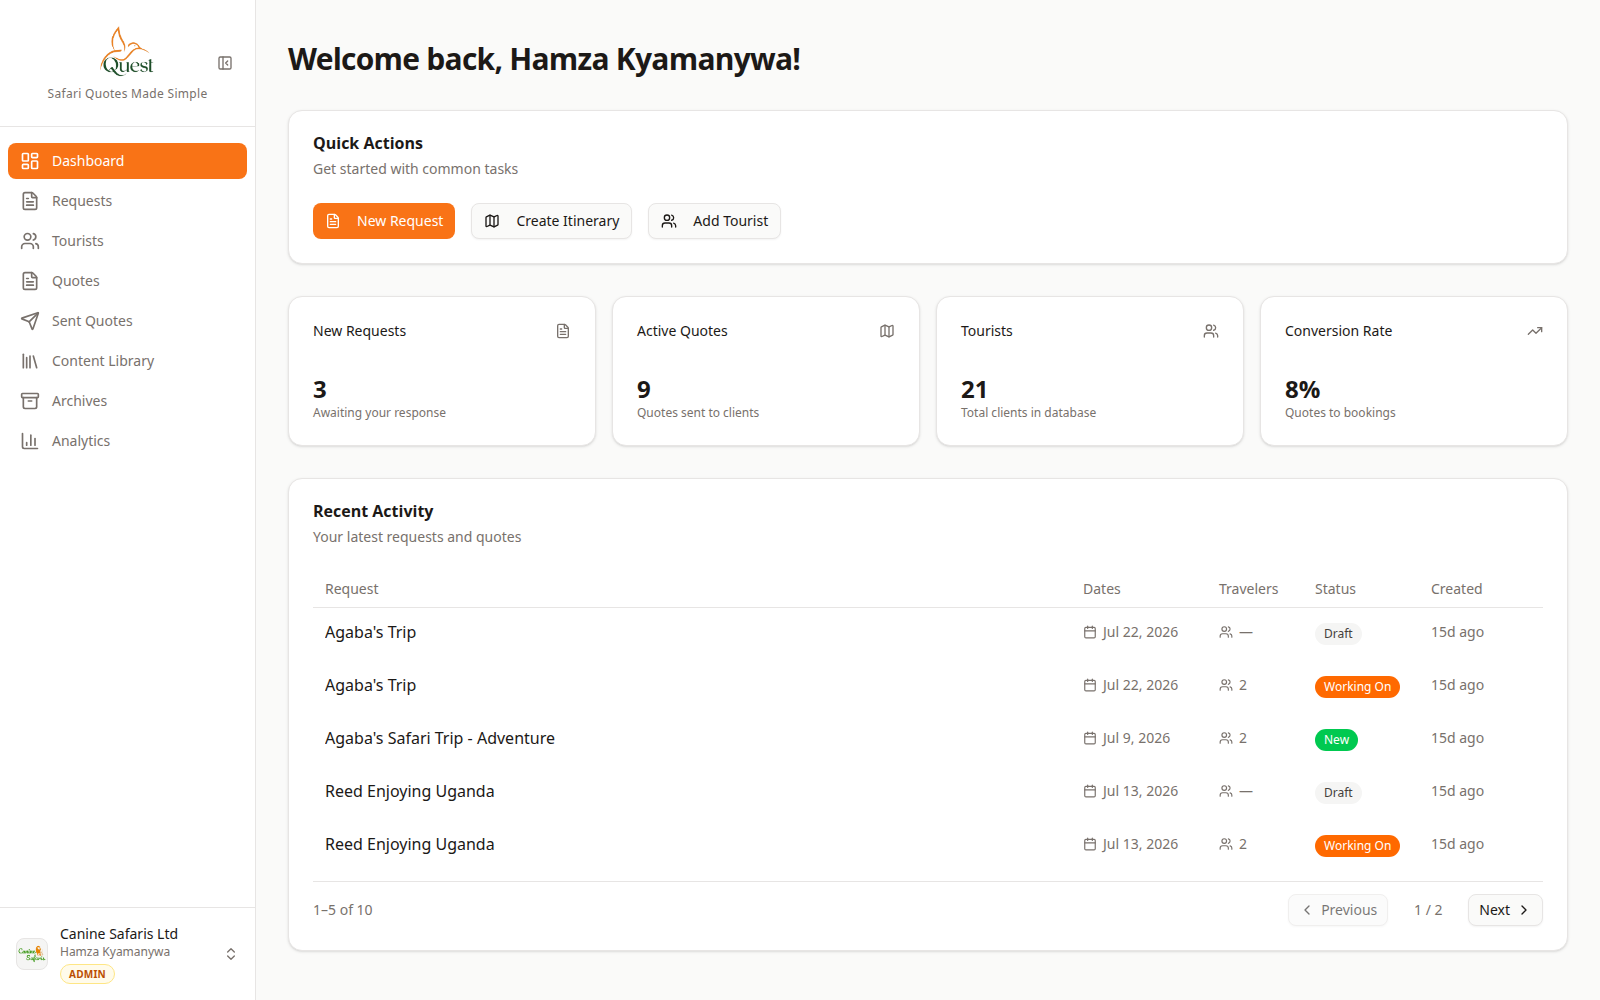
Dashboard
Home screen after login.
What the numbers mean
- 1
Quick Actions
Short cuts such as New Request. Start an inquiry here if you do not have one yet.
- 2
Main sidebar
Go to Requests, Quotes, Content Library, Settings, and more without leaving the app shell.
After sign-in you land on the Dashboard.
Use Quick Actions for common starts, or the left sidebar for Requests, Quotes, and Content Library.
- 1
- 2
Open or create a quote
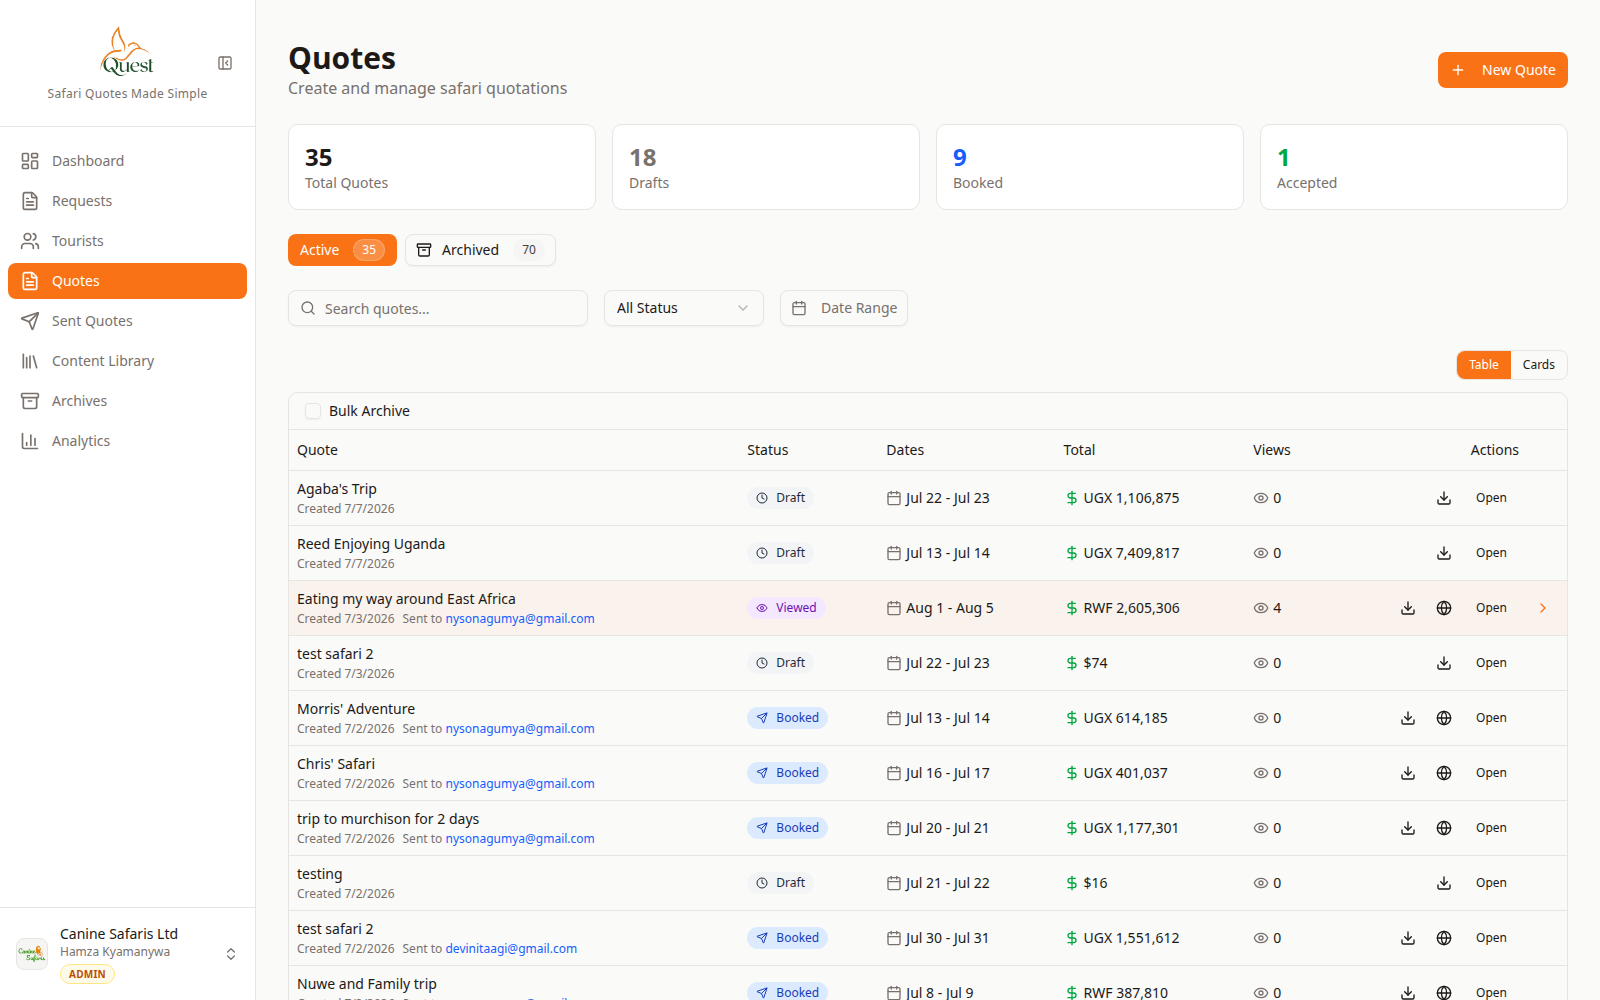
Quotes
Your draft and active quotes.
What the numbers mean
- 1
Quotes table
Click a row to open that quote in the builder.
- 2
Quotes nav
Sidebar entry for all quotes. Use Sent Quotes for already delivered ones.
Go to Quotes in the sidebar.
Open an existing draft, or create a new quote from a request / New quote flow your workspace uses.
You should see the four steps: Build Itinerary → Set Pricing → Preview Quote → Send to Client.
- 1
- 3
Build the itinerary (days)
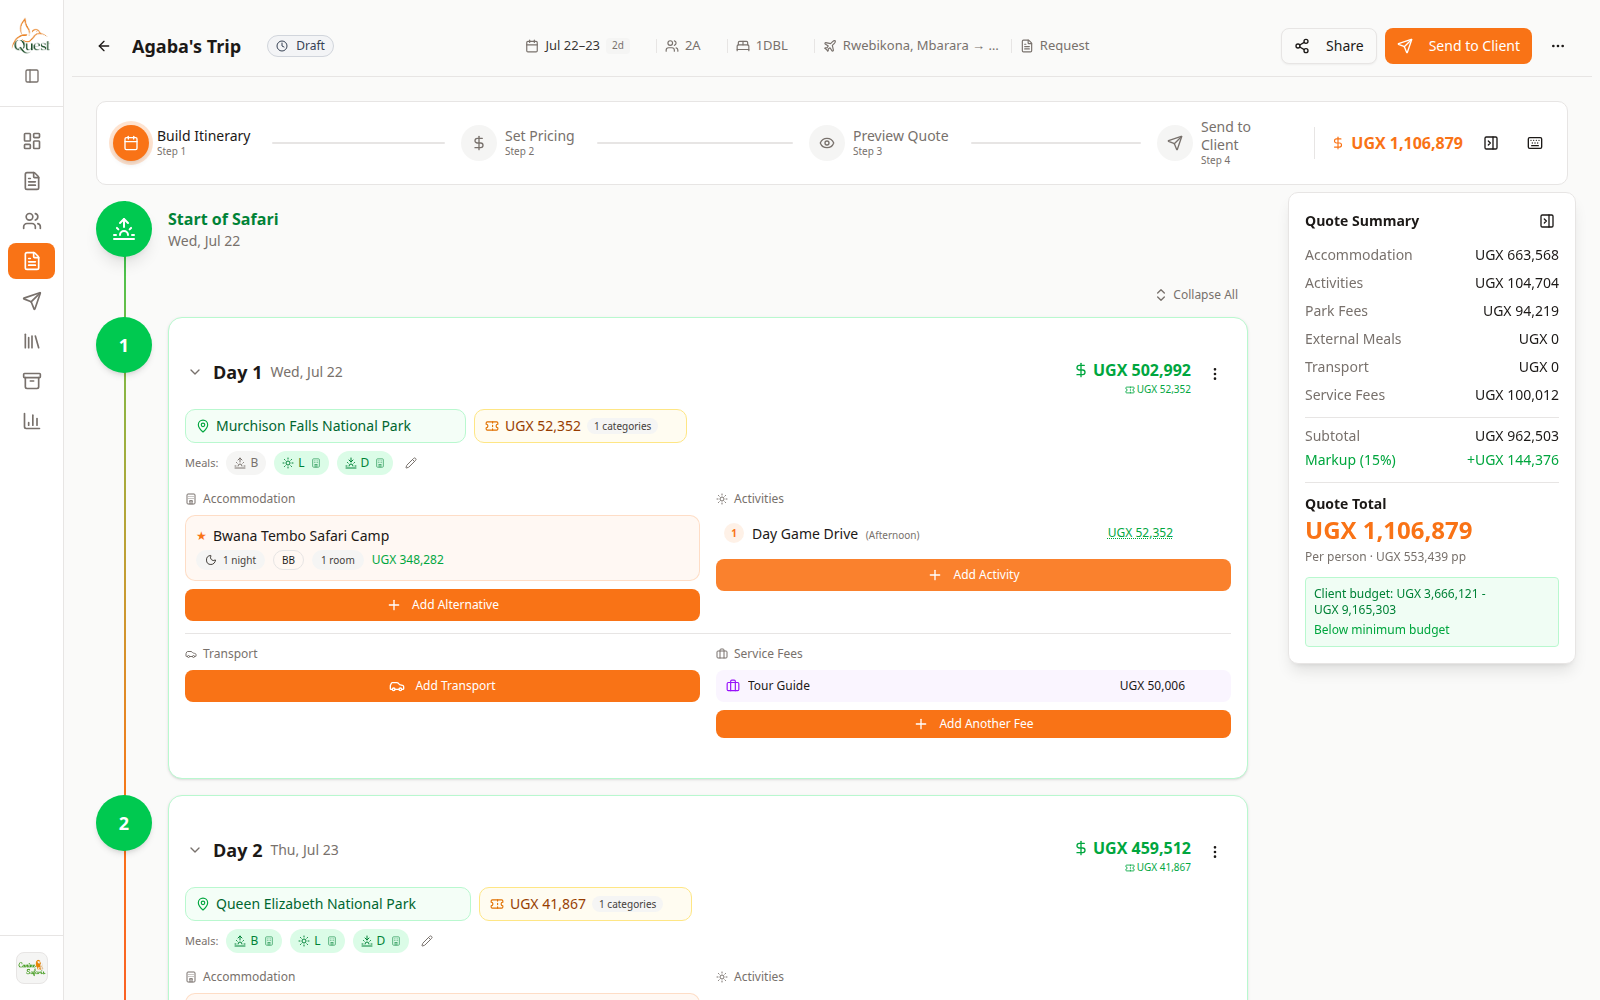
Build Itinerary
Day cards and live summary.
What the numbers mean
- 1
Build Itinerary step
You must be on step 1 to edit days. Pricing and Send are later steps.
- 2
Day cards
Each day holds destination, stay, activities, and transport for that date.
- 3
Quote Summary
Live totals for the trip. Updates as you add or remove items.
On Build Itinerary:
1. Add or expand days.
2. Set each day’s destination (park / place).
3. Add accommodation, activities, and transport with the orange + buttons on the day card.
4. Watch Quote Summary on the right as costs update.
- 1
- 4
Set pricing
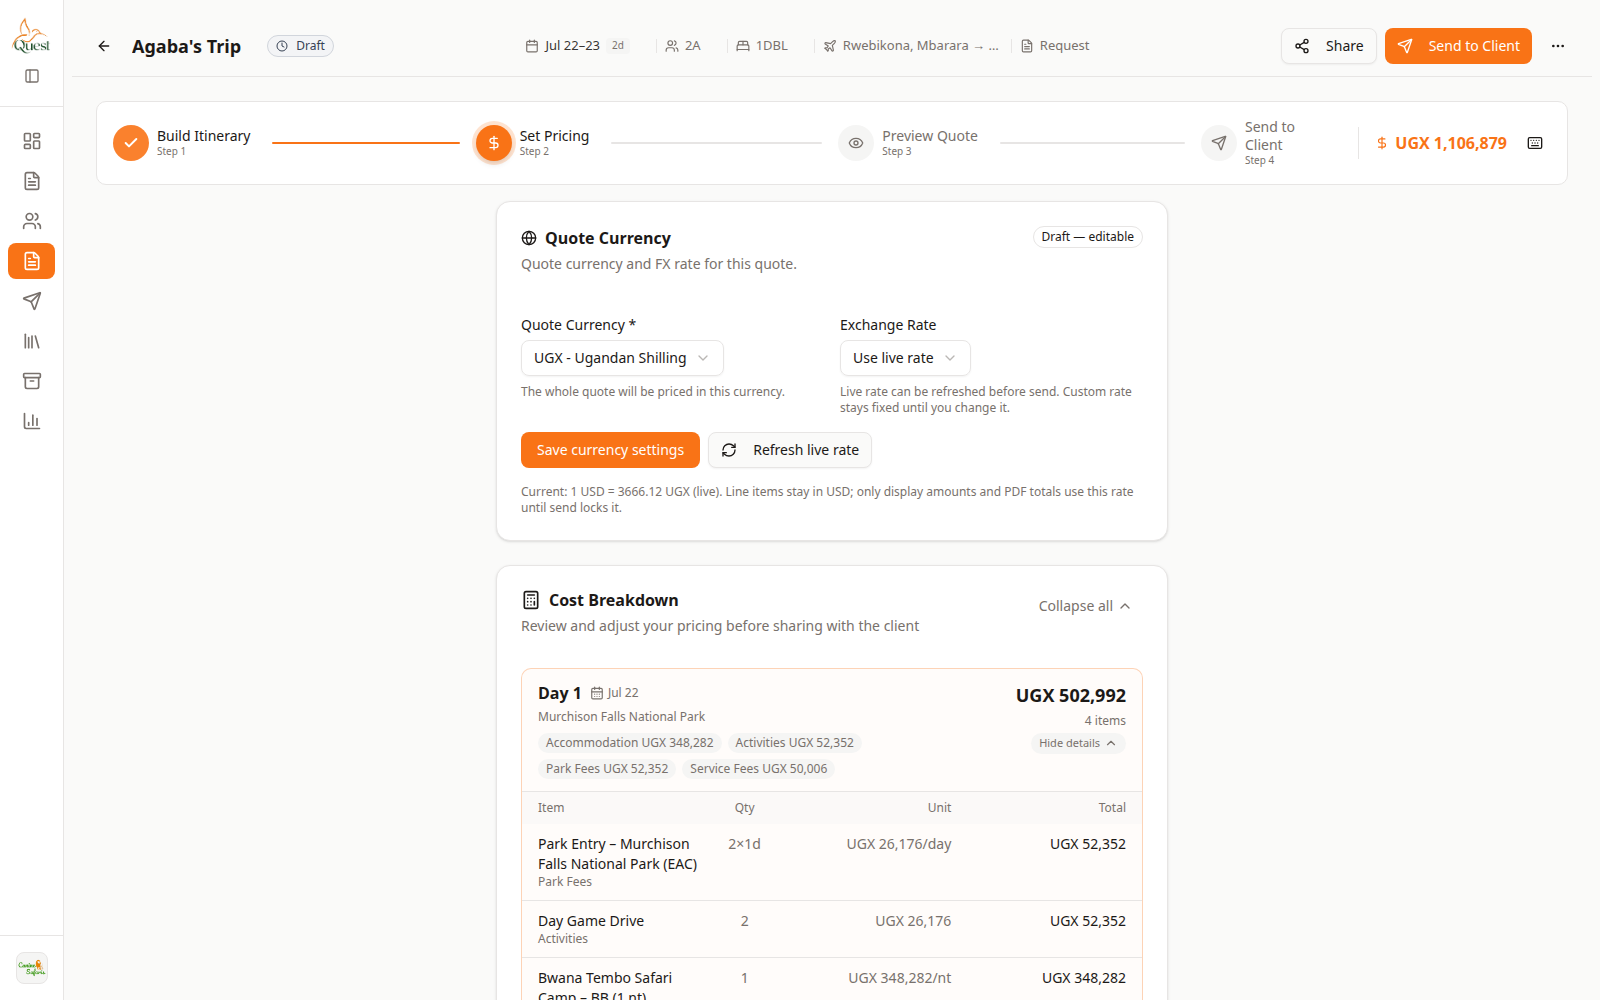
Set Pricing
Commercial review before the client PDF.
What the numbers mean
- 1
Pricing workspace
Where markup, overrides, and totals are adjusted for this quote.
- 2
Set Pricing step
Step 2 of 4 in the quote wizard.
Open Set Pricing.
Review line totals, apply markup if needed, and confirm the currency and grand total before preview.
- 1
- 5
Preview the client document
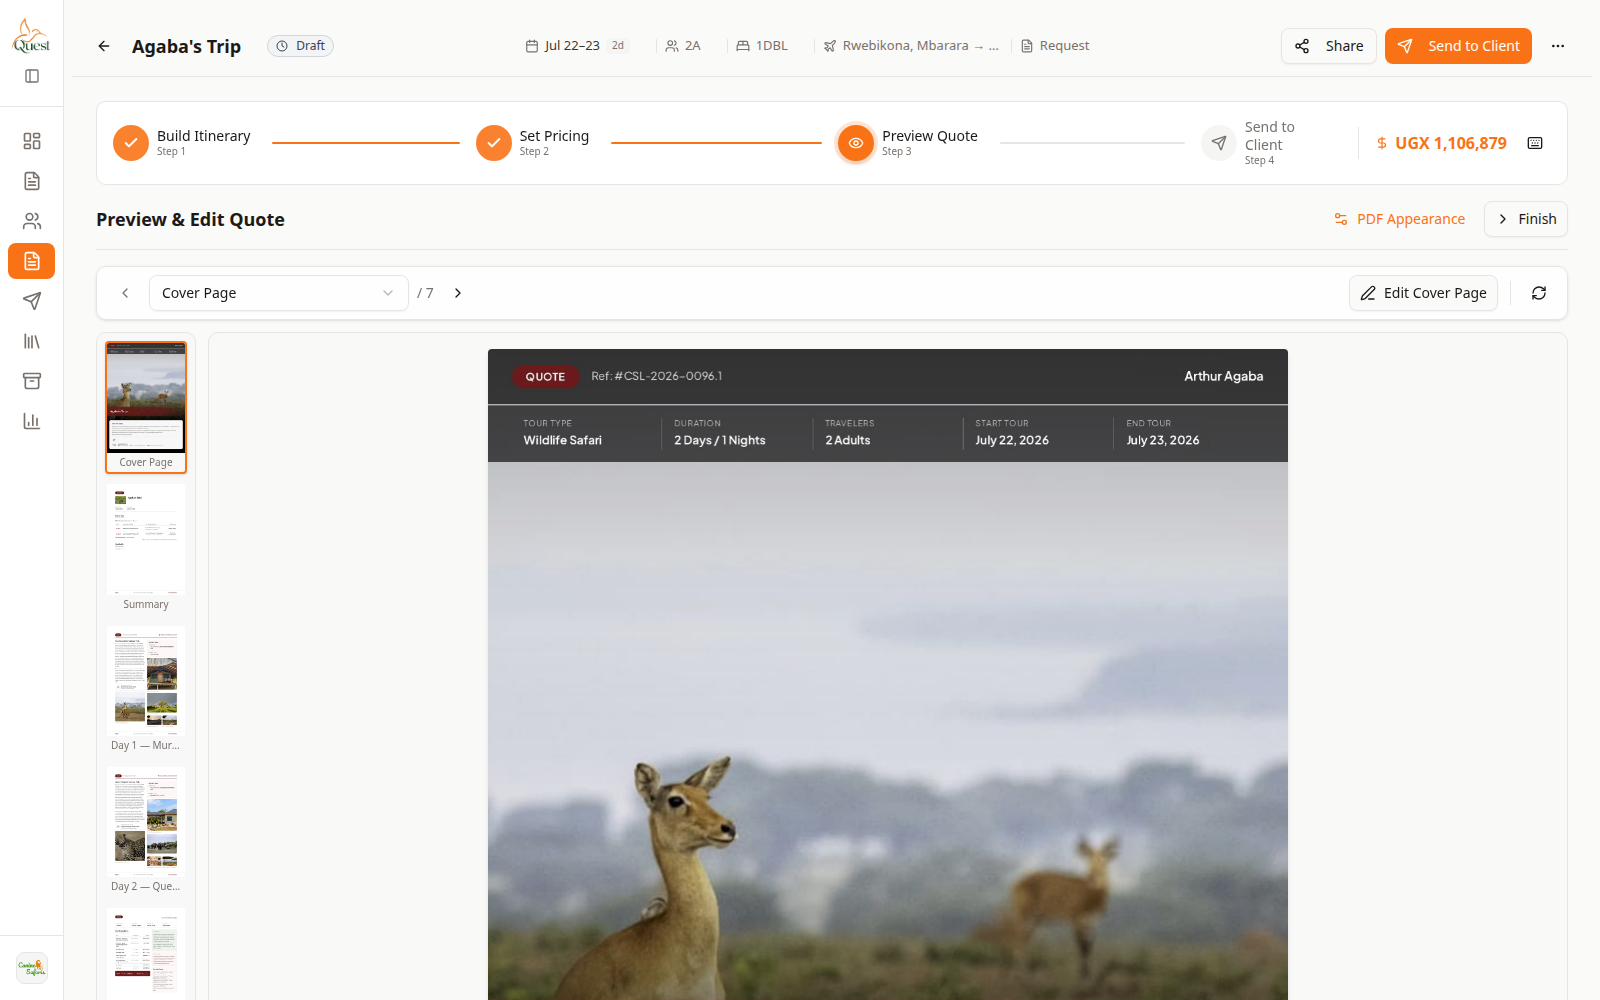
Preview
What the client document will look like.
What the numbers mean
- 1
PDF preview canvas
Scrollable preview of the proposal. Confirm branding and numbers here before send.
- 2
Preview Quote step
Step 3 of 4. Does not send anything to the client yet.
Open Preview Quote and wait for the PDF canvas to load.
Check cover, days, prices, and company name/logo. Fix issues by going back to Build or Pricing.
- 1
- 6
Send to the client
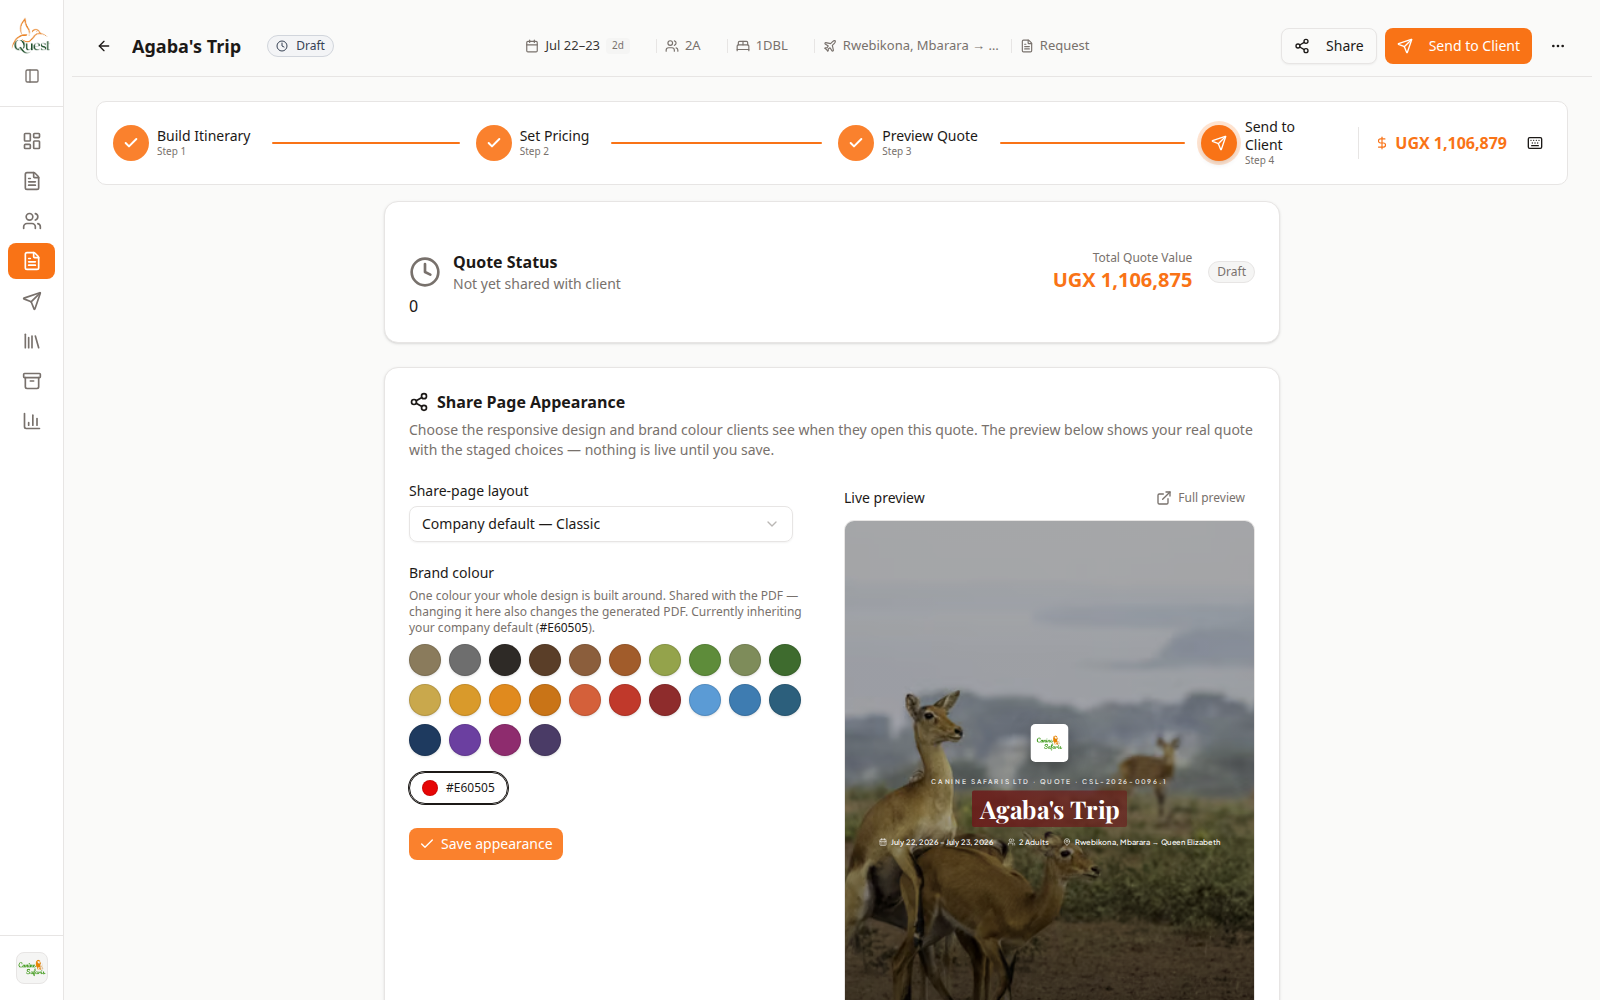
Send
Delivery options for this quote.
What the numbers mean
- 1
Send / share controls
Email, attach PDF, and share options for delivering the proposal.
- 2
Send to Client step
Final wizard step. Sending marks the quote as sent when delivery succeeds.
Open Send to Client.
Choose share layout if asked, enter the client email, optionally attach PDF, then send.
You can also copy a share link depending on your plan and settings.
- 1
Was this helpful?